今までほとんど使っていないサイトのドメインを違うドメインに変更した。新しいのはこのドメインのサブドメイン。アダルトサイトというわけじゃないんだけどGoogleのアドセンスやアフィリエイトも会社によっては制限が厳しいと聞いたので自由に書くには念のためサイトを分けておいた方がいいかなという考えでこの様にした。
そもそもエロ画像を貼る様なことはほぼないだろうしそれほど頻繁に更新することもないだろうと思いサブドメイン にしている。
因みにサーバーはGoogle Cloud Platform(GCP)を使っている。
やった 作業を備忘録で貼っておく。結構エラーが出て丸1日かかった。よかったら参考にどうぞ。
目次
- WordPressのバージョンアップ
- テーマTwenty Twentyを更新して変更
- PHPの更新が必要です
- Let’s Encryptの削除
- Let’s Encryptのインストール
- WordPressの設定
WordPressのバージョンアップ
ワードプレスが5.2で古かったので最初に5.4にバージョンアップをする。
サイトに重大なエラーがあった。WordPress でのデバッグをさらに詳しく見る。
すると以下のエラーが出た。
サイトに重大なエラーがあった。
WordPress でのデバッグをさらに詳しく見る。
リンク先を見るとwp-config.phpの修正が必要とあるので修正します。
場所は /var/www/html/wp-config.php
define(‘WP_DEBUG’, false);
を
define(‘WP_DEBUG’, true)
とtrueに書き換えるとあるがそもそもこの文がないので追加する。
すると今度は以下のエラーが出る。
Fatal error: Cannot declare class WP_Block_Styles_Registry, because the name is already in use in /var/www/html/wp-content/plugins/gutenberg/lib/class-wp-block-styles-registry.php on line 14
サイトに重大なエラーがあった。
WordPress でのデバッグをさらに詳しく見る。
検索すると
Gutenberg プラグインを一旦削除してみて。
https://ja.wordpress.org/support/topic/wp_block_styles_registry/
管理画面から削除できない場合は、WordPress Codex 日本語版の「FAQ/トラブルシューティング」ページの「管理画面にアクセスできない場合にすべてのプラグインを停止するには ?」セクションを見てね。
管理画面にアクセスできない場合にすべてのプラグインを停止するには ? #
これを参考にphpMyAdminを使ってプラグインを停止させます。
xx.xxx.xxx.xxx/phpmyadmin/index.php
root
xxxxxxxxxxxxxxxx
a:1:{i:1;s:23:”gutenberg/gutenberg.php”;}
option_value フィールドを a:0:{} に変更
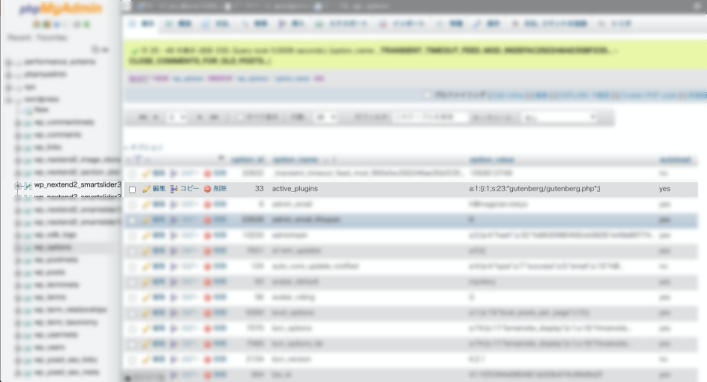
無事に表示される。
wp-config.php
に書き加えた
define(‘WP_DEBUG’, true);
を削除
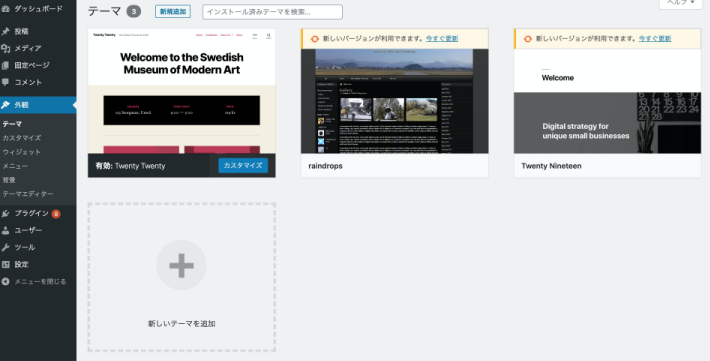
テーマTwenty Twentyを更新して変更
Twenty Twentyを変更してからTwenty Ninety からTwenty Twentyに変更
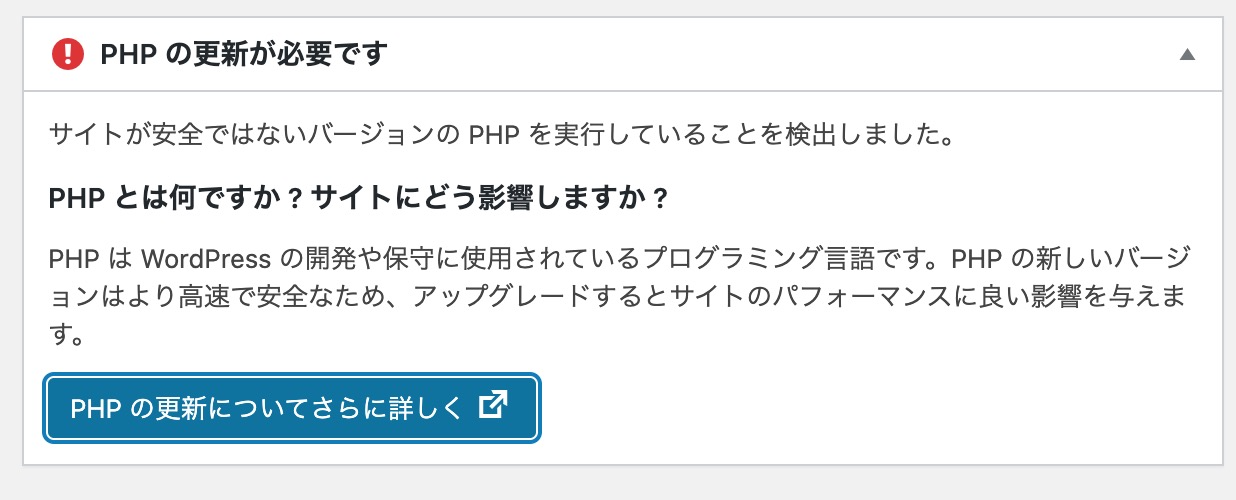
PHPの更新が必要です
ダッシュボードに、PHPの更新が必要です、と警告が出ていたのでPHPのバージョンを更新することにする。
$ php -v
PHP 7.0.33-0+deb9u7 (cli) (built: Feb 16 2020 15:11:40) ( NTS )
Copyright (c) 1997-2017 The PHP Group
Zend Engine v3.0.0, Copyright (c) 1998-2017 Zend Technologies
with Zend OPcache v7.0.33-0+deb9u7, Copyright (c) 1999-2017, by Zend Technologies
$ sudo apt update
$ sudo apt install -y curl wget gnupg2 ca-certificates lsb-release apt-transport-https
$ sudo wget https://packages.sury.org/php/apt.gpg
$ sudo apt-key add apt.gpg
$ echo “deb https://packages.sury.org/php/ $(lsb_release -sc) main” | sudo tee /etc/apt/sources.list.d/php7.list
$ sudo apt update
$ sudo apt install -y php7.4 php7.4-cli php7.4-common
$ php -v
PHP 7.4.7 (cli) (built: Jun 12 2020 07:48:26) ( NTS )
Copyright (c) The PHP Group
Zend Engine v3.4.0, Copyright (c) Zend Technologies
with Zend OPcache v7.4.7, Copyright (c), by Zend Technologies
$ sudo apt install -y apache2 libapache2-mod-php7.4
$ sudo apt install -y php7.4-mysql
php -m | grep -i mysql
アパッチ、拡張機能のインストール
$ sudo apt install -y php7.4-mysql php7.4-dom php7.4-simplexml php7.4-ssh2 php7.4-xml php7.4-xmlreader php7.4-curl php7.4-exif php7.4-ftp php7.4-gd php7.4-iconv php7.4-imagick php7.4-json php7.4-mbstring php7.4-posix php7.4-sockets php7.4-tokenizer
$ sudo apt install php7.4-bcmath php7.4-bz2 php7.4-curl php7.4-intl php7.4-mbstring php7.4-mysql php7.4-readline php7.4-xml php7.4-zip
y
$ sudo a2enmod php7.4
$ sudo service apache2 restart
phpinfoを表示するファイルをドメイン直下に作成
$ sudo nano phpinfo.php
<?php phpinfo();?>
以下の様に7.0のまま。
PHP Version 7.0.33-29+0~20200514.36+debian9~1.gbp126f6f
$ sudo update-alternatives –config php
There are 2 choices for the alternative php (providing /usr/bin/php).
Selection Path Priority Status
- 0 /usr/bin/php7.4 74 auto mode
1 /usr/bin/php7.0 70 manual mode
2 /usr/bin/php7.4 74 manual mode
Press to keep the current choice[*], or type selection number:
y
PHP7.0を削除する。
$ sudo apt purge php7.0 php7.0-common
https://xxx.xxxxx.com/phpinfo.php
PHP Version 7.4.7
参照:「phpの更新が必要です」WordPress、Debian 9でphp7.0から7.4へ、GCP環境
Let’s Encryptの削除
Let’s Encryptの確認
$ sudo certbot certificates
Saving debug log to /var/log/letsencrypt/letsencrypt.log
Found the following certs:
Certificate Name: xxx.xxxxx.com
Domains: xxx.xxxxx.com
Expiry Date: 2020-09-20 21:17:43+00:00 (VALID: 81 days)
Certificate Path: /etc/letsencrypt/live/xxx.xxxxx.com/fullchain.pem
Private Key Path: /etc/letsencrypt/live/xxx.xxxxx.com/privkey.pem
証明書を無効化
$ sudo certbot revoke –cert-name=xxx.xxxxx.com
Saving debug log to /var/log/letsencrypt/letsencrypt.log
Would you like to delete the cert(s) you just revoked?
(Y)es (recommended)/(N)o: y
Deleted all files relating to certificate xxx.xxxxx.com.
Congratulations! You have successfully revoked the certificate that was located
at /etc/letsencrypt/live/xxx.xxxxx.com/fullchain.pem
失効と同時に証明書も削除された様。
$ sudo ls -al /etc/letsencrypt/live/
total 12
drwx—— 2 root root 4096 Jul 1 05:46 .
drwxr-xr-x 9 root root 4096 Jul 1 05:48 ..
-rw-r–r– 1 root root 740 Feb 26 2019 README
参照:Let’s Encryptの証明書を簡単に削除する方法
参照:4 Let’s Encryptの証明書を削除したらサイトに繋がらなくなるトラブル
しかしアパッチを再スタートしたところ以下の様なエラーが出て立ち上がらなくなってしまう。
$ sudo service apache2 restart
Job for apache2.service failed because the control process exited with error code.
See “systemctl status apache2.service” and “journalctl -xe” for details.
エラー箇所を探す
$ sudo apachectl configtest
AH00526: Syntax error on line 33 of /etc/apache2/sites-enabled/000-default-le-ssl.conf:
SSLCertificateFile: file ‘/etc/letsencrypt/live/xxx.xxxxx.com/fullchain.pem’ does not exist or is empty
Action ‘configtest’ failed.
The Apache error log may have more information.
エラー箇所のあるファイルを行番号を付けて出力。
$ nl /etc/apache2/sites-enabled/000-default-le-ssl.conf
26  ServerName xxx.xxxxx.com
27  SSLCertificateFile /etc/letsencrypt/live/xxx.xxxxx.com/fullchain.pem
28  SSLCertificateKeyFile /etc/letsencrypt/live/xxx.xxxxx.com/privkey.pem
29  Include /etc/letsencrypt/options-ssl-apache.conf
サーバーのURLの記載のあるところを削除
$ sudo nano /etc/apache2/sites-enabled/000-default-le-ssl.conf
エラーを確認するとOKとなる。
$ sudo apachectl configtest
Syntax OK
$ sudo service apache2 restart
しかし、アパッチを再起動すると以下のエラーが表示される。
このサイトは安全に接続できません
xxx.xxxxx.com から無効な応答が送信された。
ERR_SSL_PROTOCOL_ERROR
サーバー側からサーバーリセット
xx.xxx.xxx.xxx/phpmyadmin/index.phpでhttpの記述、または以下、ファイルに追加を実行するも解決せず。
wp-config.php
define(‘WP_SITEURL’, ‘http://xxxxxxxx.com’);
define(‘WP_HOME’, ‘http://xxxxxxxx.com);
/cms/wp-content/themes/aiwa_theme/functions.php
update_option( ‘siteurl’, ‘xxxxxxxx.com’);
update_option( ‘home’, ‘xxxxxxxx.com’);
結局削除
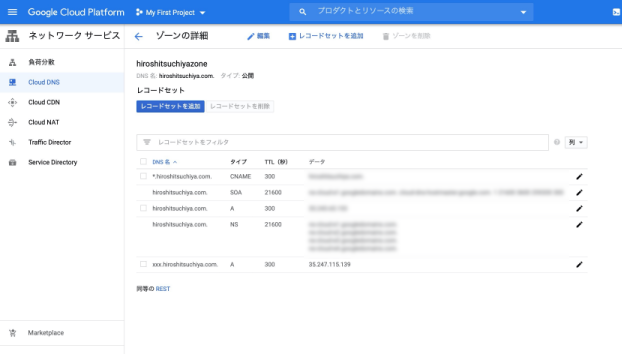
サーバー側(GCP)からレコードセットの追加と削除をしたところ新しいURLで接続ができる様になった。
Let’s Encryptのインストール
今まで何度もやっているので前に書いた記事を見ながらやる。
参照:Let’s Encryptを使ってSSL対応とその設定方法
今まで出てきたことのないのが出現
とりあえず1を選択。
We were unable to find a vhost with a ServerName or Address of xxxxxxxxxxxx.com.
Which virtual host would you like to choose?
1: 000-default-le-ssl.conf | | HTTPS | Enabled
2: 000-default.conf | | | Enabled
Select the appropriate number [1-2] then [enter] (press ‘c’ to cancel): 1
Deploying Certificate to VirtualHost /etc/apache2/sites-enabled/000-default-le-ssl.conf
確認
$ sudo certbot certificates
Saving debug log to /var/log/letsencrypt/letsencrypt.log
Found the following certs:
Certificate Name: xxxxxxxxx.com
Domains: xxxxxxxxx.com
Expiry Date: 2020-09-29 12:05:33+00:00 (VALID: 89 days)
Certificate Path: /etc/letsencrypt/live/xxxxxxxxxxxx.com/fullchain.pem
Private Key Path: /etc/letsencrypt/live/xxxxxxxxxxxx.com/privkey.pem
問題なくインストールできた様。
最後にこちらに接続
Qualys SSL Labs
前はAだったけど今回はB。大丈夫なんだろうか?
今度暇な時に調べて見ます。
因みに下の画像はFirefoxのデフォルトのスクリーンショットで全体表示が取れるのを知り撮って見ました。長いね。
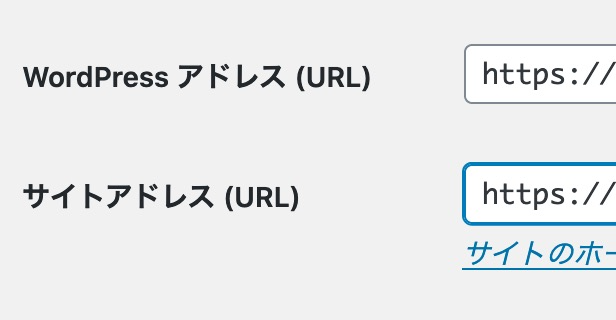
WordPressの設定
ダッシュボードの設定の一般設定でWordPress アドレス (URL)とサイトアドレス (URL)にhttpsのアドレスを入力する。